Parasitics simulation
Step 1, creating a new stackup from existing Gerbers or DXF files
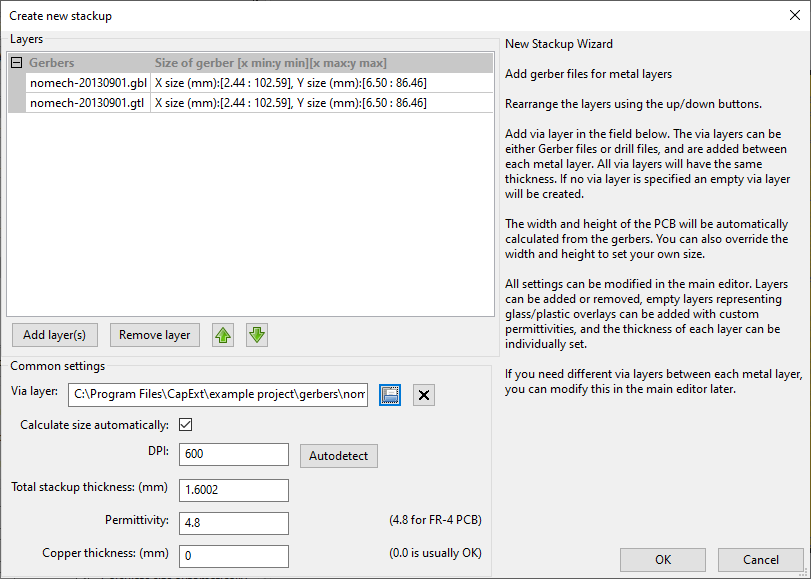
To create a new stackup, select File->New Stackup.
You will be presented with the New Stackup Wizard which lets you choose the basic stackup parameters such as thickness, which files to use for the different layers and so on.
 Click
to magnify.
Step 2, modify the stackup
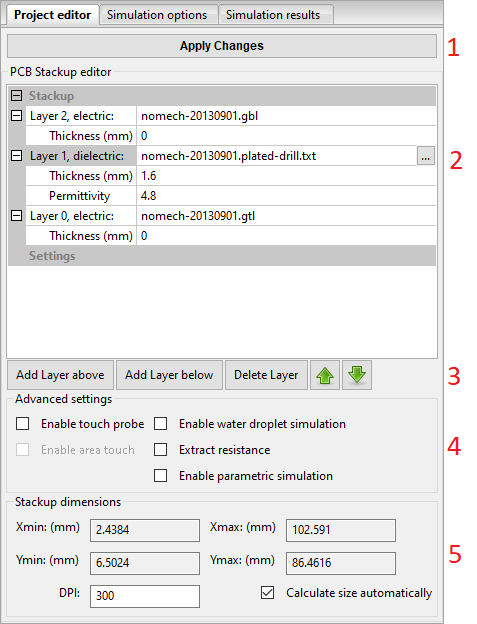
After clicking OK in the New Stackup Wizard, you will be presented with the main view.
You can use the PCB Stackup Pane to modify the stackup, for example to add an overlay or air-gap.
Press Apply Changes when you are done.
 Click
to magnify.
Step 3, prepare the simulation
Select the Simulation Options Pane.
To queue an electrode for simulation, click on the electrode in either the electrode list on the left or directly on the electrode in the 3D/2D view.
To help you find the nets you are interested in later, it is useful to rename the electrodes you are interested in.
You can usually leave Max. Simulation iterations at the default value. If you see that the uncertainty is too high after the simulation, you can try to double the number of iterations and re-run the simulation until the uncertainty is acceptable.
Step 4, run the simulation
Press run simulation to start the simulation.
This step will usually take 1-5 minutes depending on your computer and the number of electrodes queued for simulation.
Step 5, inspect the simulation results
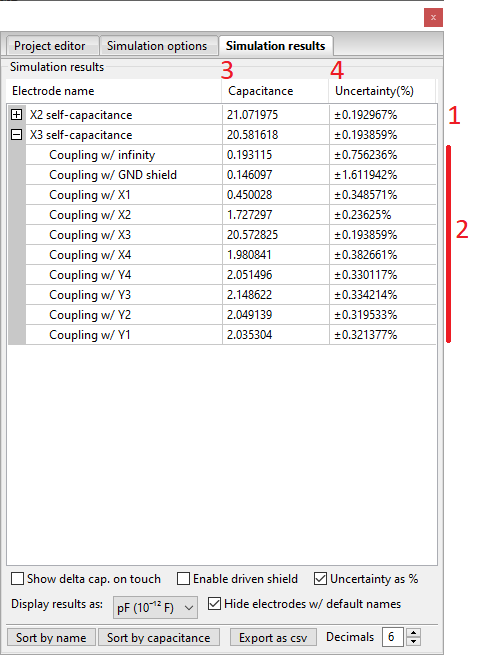
CapExt extracts both self- and mutual capacitances for the selected electrodes.
To read out the results, select the Simulation Results Pane.
 Click
to magnify.
Remember to check the uncertainty for the results of interest. To decrease the uncertainty, re-run the simulation with a higher iteration count.
